Saturday 24 August 2013

(Cloud) Storage Wars - The Battle for Unlimited Cloud Storage (aka how to back up everything!)

We are in the era of storage wars...cloud style. Prices are dropping and free offers are growing. I managed to get two 25gb skydrive accounts before they were cut back to 7gb. Now 50gb is available if you look hard enough. Some people are moving away from hard drives altogether. Its hard to remember that cloud storage is only a few years old. Cloud storage refers to the ability to upload your own files and share friends files over a secure internet connection.

 50gb is likely to be much more than your smartphone. Indeed syncing with your smartphone is a really nice feature that most cloud services offer via their ios and android apps. Want to transfer your itunes to your smart phone without using googlemusic? You can. Want movies on your phone from your cloud, you can. Just want your work files? No problem.


In March 2006 Amazon S3 (Simple Storage Service) was launched, a an online file storage web service offered by Amazon Web Services that could be leased out. Dropbox, Bitcasa and Ubuntu One all use the amazon infrastructure. Dropbox is probably best known.

In 2007 the Dropbox, founder conceived the idea after repeatedly forgetting his USB drive while he was a student at MIT in the US. Dropbox.com was launched late 2009, when they acquired their current domain, "dropbox.com". It attracted millions in investment including from The U2 stars Bono and the Edge. Users user frew from 5m in 2010 to 25m in 2011 and 175m in June 2013.


Then the big players entered the market Microsoft with skydrive (200 mi), Google with Gdrive and Apple with icloud (300mi). These have helped keep prices down but there is a catch with all of these services: either limited capacity or limited files size or both. For example dropbox offers a rather pathetic 2gb on free services with a maximum 300mb per file (when uploaded via the web). The cost per GB is about $1 per year (ie $99 for 100gb). Skydrive and Gdrive are significantly cheaper however but only give away 7gb and 15gb respectively. Google's recently upped capacity to15gb is not bad but it is shared with gmail's email footage. Another plus for google drive is that maximum file size is a very generous 10gb...enough for almost anything inc video (10gb = 2hr 1080p movie). 


Maximum file size is really quite important. Typical files sizes are

JPG photo = 10mb
RAW photo = 50mb
5min mp3 = 50mb
5min lossless audio = 200mb
10min video clip = 200mb
1hr 720p HD video = 1gb
2hr 1080p HD video = 10gb
1hr uncompressed video = 50gb 


Ideally you want a cloud service with good storage capacity and high filesize allowance and no bandwidth throttle and nice features. A really nice service with great features and 50gb free and fair 250mb mx filesize is box.com. 50gb is available from Dell advantage or by emailing box staff btw. 


A nice review of cloud services is here: http://gizmodo.com/5990589/the-best-way-to-store-your-stuff-in-the-cloud


 If you want to maintain access to files across multiple PCs then sugarsync is a great option. Free allocation is nothing special but it often runs 50% off offers making $50 for 100gb. Its feature set is excellent and interface second to none.


250mb filesize not enough? 


One of my current favourites is Cloud.com is totally unlimited and the free allocation has recently been boosted to 15gb to match google. Use this link and you'll get 20gb free

https://copy.com?r=0b6JtG

50gb not enough? Then perhaps the answer is the new raft of unlimited services...although none are free. 

Bitcasa offers unlimited filesize and the first 10GB are free for around $99 or £70 you get no limits at all. This sounds great but I have had some problems uploading to bitcasa so I am holding off for now.


Carbonite was designed to backup whole hard drives.  Unlimited space costs about $60 a year, and Carbonite to just back up all your stuff automatically, so all your crap will be stored in the unlimited cloud without a thought. However there is a  4GB max for uploaded files ( I think you can upload these manually).


Backblaze is $50 a year for unlimited storage, but it doesn't have any Android support.


Others to consider are mediafire which seems really cheap and works well in my limited testing but it does have a 300mb filesize cap on free accounts.

Cloud services offer stability for your data provided the company itself doesn't go bust (lookup megaupload!). Someone may well launch a totally unlimited service, perhaps tied to purchase of their hardwear. Next time I'll look at how to tie multiple cloud service together.


Thursday 11 July 2013

Its not about the (4k) camera - Blackmagic Pocket Cinema Camera


As lance said, its not about the bike...now in TV and movies its not all about camera either, but a good camera certainly helps.

In this pic, you see the Arri Alura 18-80 zoom lens F2.6, which if I told you was about £500....that would be the price to hire for 1 day! The full price is closer to £20,000 added to which is all manner of lens accessories. Now on the back you have the new blackmagic cinema pocket camera at a humble price of £750 ($1000).

It has  13 stops of dynamic range and lossless recording (compressed) to SD card in Apple ProRes, lossless compressed or CinemaDNG RAW capture and active Micro Four Thirds lens mount.

Its not 4k (theres another blackmagic camera for that) but it appears to offer great quality in an amazingly small package. A bit like the Go Pro Hero 3 Black Edition for grown-ups!


It supports the common Micro Four Thirds system for lenseseg Panasonic 14mm lens at f/2.5. It has a headphone jack, microphone jack, HDMI port and a LANC remote control port. The sensor is 12.48mm by 7.02mm which isn’t actually that big, smaller than even the standard Micro Four Thirds sensor. It records in full 1080p at up to 30fps. It has a 3.5-inch screen on the back with a 800×480 resolution which is pretty low. But then you can connect an external monitor via the HDMI port if you really wanted to.


Monday 24 June 2013

A Quick Tutorial on Making a Video Podcast of a Lecture in High Definition


Ok lets say you want to video a talk or lecture, how do you go about this? Here is my 10 step guide

1. Permission
Get permission of the lecturer (and possibly the organizer / venue) so they know what to expect

2. Equipment
To record a lecture you need to a video camera, ideally one with audio inputs. You also should have a sound recorder or wireless lapel (lavier) microphone

3. Video 
The easy bit is actually the video footage. Careful with the lighting. I recommend an LED light from the camera to the speaker. To record in high definition you need a HD camera. Medium HD (1280x720) is usually more than sufficient and would be 1gb per hour. If you want to show off, 1920x1080 is full HD and thats going to be 5gb in one hour. 5GB is going to take quite a few hours just to upload, so I wouldn't master in 1080p unless you know what you are doing. I recommend a frame rate of 25p (or 50i) rather than 50p which is overkill for a lecture.

Which camera? Any camcorder on the market will do 720p, most will do 1080i or 1080p. Panasonic and Sony are very good even at the £200-400 mark.


4. Sound
The sound is critical. Big rooms sound terrible from the on-board camera mics...too boomy and full of background noise. Therefore you have to record as close to the speaker as possible. Ideally with a good quality wireless lapel mic. These can be very expensive but there is a good value Audio technica one here Amazon. Without a wireless system you can capture the audio onto a good quality soon recorder (tascam, marantz etc) or even a good dictaphone (use one with an external mic)

5 On location
Run a test piece if possible, check the sound, lighting and coverage. Generally there is no need to capture the slides and the speaker at the same time, but this does help when editing. 

> Now record the lecture always keeping the speaker in shot, leave some space either side if they move, but be prepared to pan. Oh yes, don't even think of recording without a tripod. 

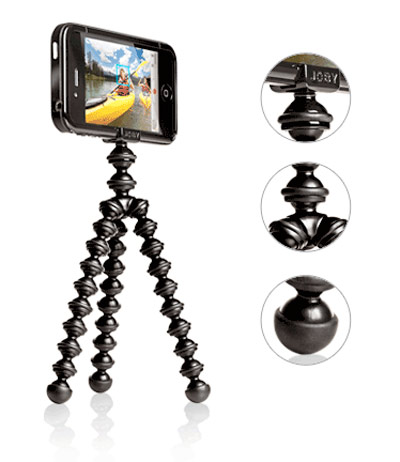
> iPhone recording? It can be done but use a mini-tripod and record the sound seperately


Ask the speaker for a copy of their slides if possible. If not, you may have to take a seperate footage of the slides, or still photos. If possible grab a couple of shots of the audience.

6. Editing
I recommend editing together the speaker footage with fades into jpgs of the slides. Keep to audio seemless. Which video editor? Thats personal choice. I hear it can be done with several free online programs now, even Adobe Premier CS2 is free if you search google. However I personally use Sony Vegas.


7. Converting Powerpoint slides => JPG
This is pretty easy, just select save as jpg and PPT will output to photo type jpgs. Sadly these are pretty horrible 960 × 720; usually the wrong format and resolution! At first it appears there is no way to change PPT to output to 16x9 (eg 1920x1080) but there is a trick explained here. If you want 1080p from PPT you have to change the PPT registry defaults as follows. The usual cautions apply.

  1. Exit all Microsoft Windows-based programs.
  2. Click Start, and then click Run.
  3. In the Open box, type regedit, and then click OK.
  4. Expand the registry to the subkey for the version of PowerPoint that you are using:

    PowerPoint 2003
    HKEY_CURRENT_USER\Software\Microsoft\Office\11.0\PowerPoint\Options
    PowerPoint 2007

    Note The registry subkey for PowerPoint 2007 will not work with Office 2007 Service Pack 1.
    HKEY_CURRENT_USER\Software\Microsoft\Office\12.0\PowerPoint\Options
    PowerPoint 2010
    HKEY_CURRENT_USER\Software\Microsoft\Office\14.0\PowerPoint\Options
    PowerPoint 2013
    HKEY_CURRENT_USER\Software\Microsoft\Office\14.0\PowerPoint\Options
  5. Click to select the Options subkey, point to New on the Edit menu, and then click DWORD Value.
  6. Type ExportBitmapResolution, and then press Enter.
  7. Make sure that ExportBitmapResolution is selected, and then click Modify on the Edit menu.
  8. In the Value data box, type the resolution value that you want, based on the following table.

    Note The maximum resolution setting that PowerPoint 2003 exports is 307 dpi.
    Decimal value Fullscreen Pixels (horizontal × vertical)Dots-per-inch (horizontal and vertical)
    50500 × 37550 dpi
    96 (default)960 × 72096 dpi
    1001000 × 750100 dpi
    1501500 × 1125150 dpi
    2002000 × 1500200 dpi
    2502500 × 1875250 dpi
    3003000 × 2250300 dpi
    Decimal valueWidescreen Pixels (horizontal × vertical)Dots-per-inch (horizontal and vertical)
    50667 × 37550 dpi
    96 (default)1280 × 72096 dpi
    1001333 × 750100 dpi
    1502000 × 1125150 dpi
    2002667 × 1500200 dpi
    2503333 × 1875250 dpi
    3004000 × 2250300 dpi
  9. Click Decimal, and then click OK.
  10. On the File menu, click Exit to exit Registry Editor.
 8. Mastering
So now you output your file as a video file, usually that would be in mp4 (or maybe *.mov) on a mac. It usually takes a PC 1-3hours to render a 1 hour video. You need the space on your HD as well. Say 5gb for the raw footage and 1-2gb for the master....and thats for one lecture

9. Uploading
Check the rendered file for errors and comedy moments. Now, once happy, you need to upload the file to a friendly popular video server. OK, youtube. Youtube will accept any size file, any resolution, any length.....but you might need an account in "good standing" with some small uploads first. Vimeo is a nice alternative and videos can be password protected on vimeo but not youtube.


10. Advertise
Once youtube has your file, it will compress it internally and give you the link. Choose a good title, and description. You can add comments and links on top of the youtube file in post-post processing. Test the link, then finally send the link to your intended audience.

ALTERNATIVELY, all too much trouble? Ask you friend audio-visual team to do all this for you!

Saturday 2 February 2013

How to Run More then One External Monitor over USB

Running multiple monitors from one laptop (or desktop) has been attractive for more than a decade. Of course most people run only one (actually microsoft estimate that 15% of PC users and 4% of laptop users run more than one). Indeed many people have old monitors (even low res ones) lying unused that could be quite handy as add-on external monitors. The old way to do it was to buy a fancy graphics card with multiple VGA outputs than came onto the market in the late 1990s (see Matrox m9188 x 16 which allows 8 monitors at a time).


For laptops this was not an option, but some expensive solutions came along like the CinePort Express. CinePort Express FX2  allows you to add two additional analog or digital displays to your laptop with resolutions up to 2048 x 1536 for analog and 1920x1200 for digital; combined with your laptop’s external monitor port, the laptop can support three external displays and your laptop’s onboard display with the CinePort FX2.The only problem is the cost which is about $1700 (link)


However there are now a number of new solutions that work over USB. Yes since 2000, USB2 and USB3 allow video signals (and sound and data). The only limitation is that processing is done via the main CPU so that refresh rates may be laggy for big displays. However the browsing, office etc there is probably no problem. The cost of USB to VGA or DVI adapters is remakably cheap, around $50-$100. 


Resolutions are limited to 1920 x 1200 (that full HD) over USB2 but if you have a new computer with USB3.0 you can go to 2560x1600 if you have a suitable monitor. A suitable monitor would be a 30" monster from Dell or Apple (but check it takes HDMI/DVI/Displayport). Then you are going to need to Startech USB32DPPRO USB 3.0 to DisplayPort® External Video Card Multi Monitor Adapter – 2560x1600 . Lindy also do one pretty much the same. The adapter accepts displayport to HDMI converters. The total price less than $£100